Checking the hydraulic lifters
1. Start the engine and let it run, until the radiator fan starts on a petrol engine, a …
Okęcie airport parking – Warsaw
Chopin airport parking

Checking the hydraulic lifters
1. Start the engine and let it run, until the radiator fan starts on a petrol engine, a …
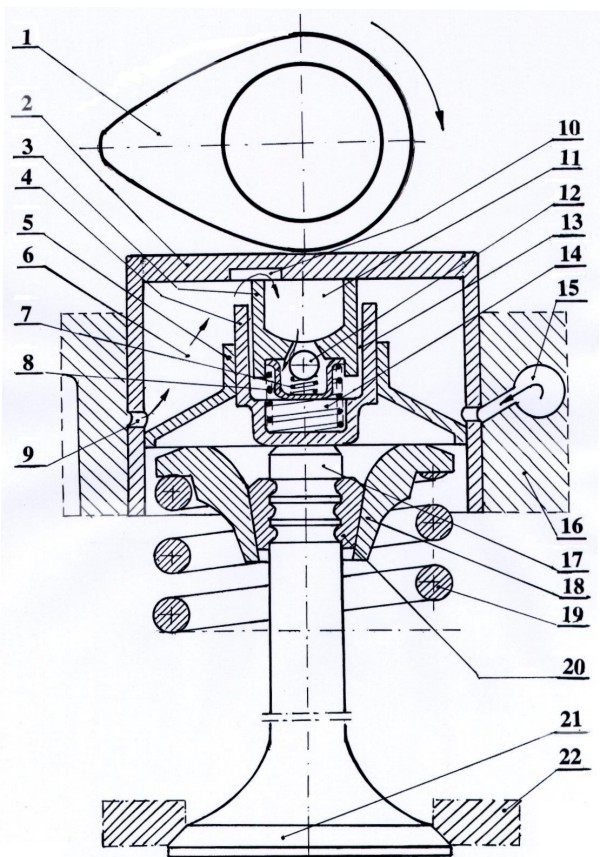 Hydraulic tappets
The increase in engine temperature is accompanied by a change in dimensions (elongation) hot parts. That is why clearance is necessary, e.g.. między wałkiem rozrządu a …
Compression pressure measurement – Golf 4 , Bora.
Next steps:
1. Warm up the engine before starting measurements. Temperatura oleju powinna wynosić …
 Compression pressure in diesel engines.
Comparing the data in the table of required compression pressure values, we can easily notice, że ciśnienie sprężania w silnikach …